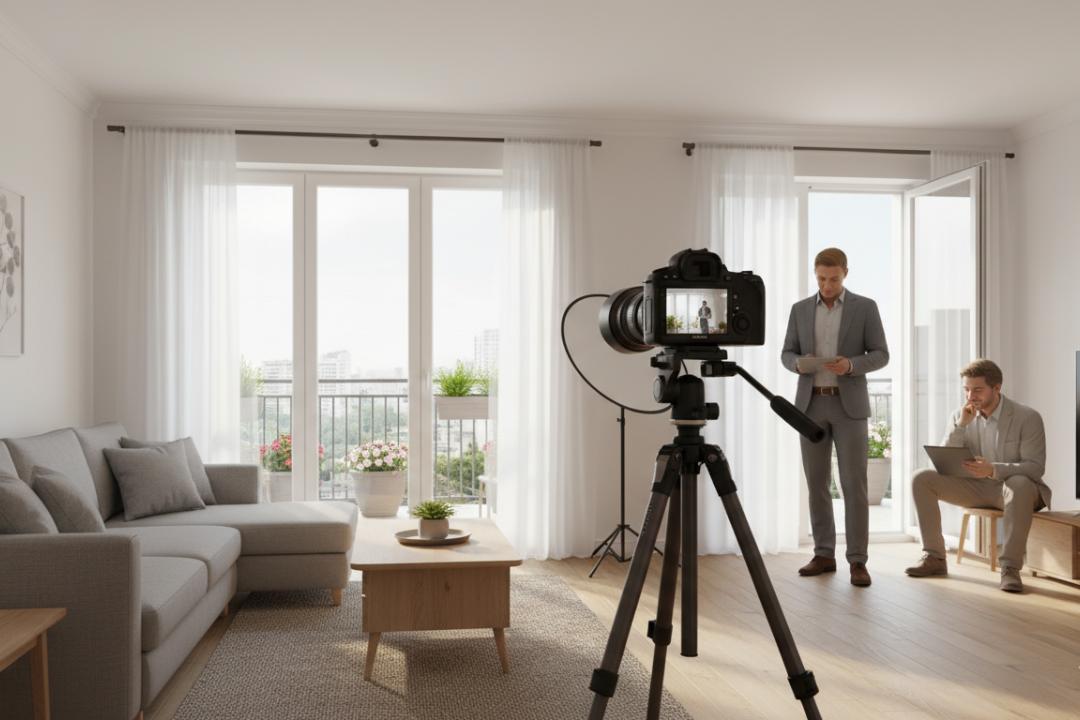
Taking great photos of your rental property isn't about having a fancy camera or knowing professional editing software. It's about presenting your property clearly, attractively, and accurately. Most renters start their search online, and your listing photos are their first impression. Dark rooms, cluttered spaces, or awkward angles can make a great rental look uninviting. With just a bit of planning and attention to detail, you can showcase your property's strengths and help it stand out in a crowded market.
HomeRiver Group has managed thousands of rental properties across the country. We understand what renters respond to and how quality visuals can affect interest and lead times. Our teams have seen the direct impact strong photos have on reducing vacancy and increasing rental income. It’s not just part of the process. It’s a strategic tool in getting results for our owners.
In this piece, we will be discussing how to take professional rental photos and share practical rental photography tips that can help your property rent faster.

Why Good Rental Photos Matter
Photos are one of the most important parts of your rental listing. They give potential renters their first look at the space and help them decide whether the property feels like a fit. Poor visuals can make a well-kept home look overlooked. Strong visuals, on the other hand, can increase interest and get your listing more views.
First Impressions Start Online
Most renters begin their search by scrolling through listings. If your photos are dark, blurry, or don’t show the space clearly, people will likely skip right past. Clear, well-lit images encourage clicks and invite renters to learn more.
Better Photos Attract Better Tenants
Attractive photos show that the property is cared for. Renters who see clean, accurate visuals are more likely to trust what they’re seeing and take the next step. It sets the right tone and brings in more serious applicants.
Faster Leasing, Fewer Questions
Well-done photos help reduce back-and-forth. When people can clearly see the layout, lighting, and features, they come to showings more prepared. This can shorten the time your property spends on the market and lead to quicker decisions.
Essential Equipment for Quality Rental Photography
You don’t need a professional studio setup to take great rental photos. A few reliable tools can help you capture clear, bright images that show your property at its best. Even basic equipment, when used correctly, can make a major difference in how your photos turn out.
A Camera With Manual Settings
You don’t need the newest model, but a DSLR or mirrorless camera gives you more control over focus, exposure, and sharpness. If you're using a smartphone, make sure it has a good lens and the ability to adjust settings like brightness and focus manually.
A Sturdy Tripod
A tripod keeps the camera steady, which is key for getting sharp images. It also helps maintain consistent height and angles from room to room. If you're photographing in lower light, a tripod becomes even more important to avoid blurry shots.
Wide-Angle Lens or Setting
A wide-angle view helps capture the full feel of a room without distorting the space. Many smartphones now have built-in wide-angle settings, and most entry-level DSLR kits come with a lens that’s wide enough for interior photography.
Natural Lighting Tools
You don't need extra lights if the space gets enough daylight. But if a room is dim, a small portable LED light can help brighten shadows. Avoid using the built-in flash directly, as it can flatten details and create harsh spots.
Prepping the Property: What to Do Before You Shoot
The way a property looks in person doesn’t always translate the same in photos. Taking time to prepare the space before shooting helps you capture clean, professional images that highlight the property’s full potential.
Clean Every Room Thoroughly
Start with a deep clean. Dust, streaks on windows, or smudges on mirrors will show up more clearly in photos than they do in person. Floors should be swept, counters wiped, and surfaces free of clutter.
Remove Personal Items and Excess Decor
Less is more. Take down personal photos, store away small decorations, and keep furniture arrangements simple. This helps renters picture themselves in the space without distractions.
Open Blinds and Turn On Lights
Natural light makes spaces feel larger and more welcoming. Open curtains and blinds fully, and turn on interior lights to balance brightness. Replace any burnt-out bulbs ahead of time.
Highlight the Best Features
If the unit has standout features like a fireplace, large windows, or updated appliances, make sure they’re clean, accessible, and ready to be photographed. Clear the surrounding space so these details are easy to see. There are also several ways to make your rental property more attractive to renters before photographing it, which can boost the appeal even further.
Lighting Techniques That Make a Difference
Lighting plays a major role in how a space looks in photos. Even a well-designed room can look dull or small if it isn’t lit properly. The goal is to show the space clearly and naturally without overexposing or underexposing any areas.
Use Natural Light Whenever Possible
Daylight gives the most balanced and inviting results. Mid-morning or late afternoon often gives the softest, most flattering light. Open all window coverings fully and let the sun do the work. If direct sunlight causes glare or sharp shadows, use sheer curtains to soften it.
Turn On All Interior Lights
Even with natural light, turning on lamps and ceiling fixtures helps create a more even look. It can also warm up the space, especially in rooms without much window coverage. Make sure all bulbs are the same color temperature for consistency.
Avoid Harsh Shadows and Glares
Position yourself so light sources are behind or beside the camera. Shooting directly into a bright window can cause the rest of the room to appear too dark. If you notice strong shadows, reposition slightly or use a small reflector or portable light to balance the scene.
Check the Lighting in Every Room
Not all rooms get the same amount of natural light. Bedrooms, hallways, and bathrooms might need extra attention. Test a few shots and make small adjustments as needed. The goal is for every space to look clean and evenly lit.
Framing, Angles, and Composition Tips
Even with good lighting and a clean space, your photos need to be framed and composed carefully. The right angles can help rooms look larger, clearer, and more inviting. The goal is to guide the viewer’s eye and help them understand how the space fits together.
Shoot From the Corners
Standing in the corner of a room helps capture more of the space in one shot. This gives viewers a better sense of the room’s size and layout. Try to show at least two walls in each photo to create depth.
Keep the Camera at Chest Height
A consistent camera height makes your photos feel balanced. Shooting from too high or too low can distort the look of the room. Aim for around five feet from the floor, which matches the average eye level when standing.
Keep Vertical Lines Straight
Door frames, wall edges, and furniture should look straight in your photos. Tilting the camera too much can make rooms appear slanted or uneven. Use a tripod with a built-in level or grid lines on your screen to help with alignment.
Show Transitions Between Spaces
Try to capture how rooms connect. Instead of taking close-up shots of every wall, step back and include doorways or openings. This helps potential renters understand the layout without needing a floor plan.
Best Time of Day to Take Photos
Lighting can change the entire mood of a photo, and the time of day you choose to shoot can make a real difference. The best time to take rental photos is during daylight hours when the space is naturally bright. For most properties, late morning or early afternoon gives you the most even light without harsh shadows.
Rooms that face east may look best in the morning, while west-facing rooms often benefit from afternoon light. Overcast days are also useful because the clouds soften natural light, helping you avoid bright spots or glare. Always avoid shooting after dark. Even with strong indoor lights, nighttime photos often look flat and do not show the property clearly.
Once you have quality images, they can play a big role in how you present the listing. Photos are a key part of learning how to advertise rental property effectively. Strong images make your listing stand out, encourage more clicks, and help renters picture themselves in the space before they visit in person.
Common Mistakes to Avoid
Even with good intentions, rental photos can fall short if certain details are overlooked. One of the most common mistakes is not cleaning thoroughly before taking pictures. Small messes, dust, or smudges become much more noticeable in high-resolution images and can make a space feel neglected.
Another issue is poor lighting. Shooting in dim conditions or relying only on overhead lights can result in dull, shadowy photos. Natural light is almost always better. Avoid using a phone’s flash, as it can wash out details and create uneven lighting.
Many listings also suffer from awkward framing. Photos taken at odd angles or from too close make rooms appear smaller and disjointed. Always aim to include enough of the space to show how it connects with nearby areas.
Finally, avoid over-editing. Adjusting brightness or cropping a photo is helpful, but filters or heavy color adjustments can make the property seem different from how it really looks. That can lead to disappointment at showings and longer vacancy periods.
Final Thoughts
Strong rental photos are more than just a helpful add-on. They are often the deciding factor in whether a potential renter clicks on your listing or scrolls past it. By taking the time to clean, light, and shoot each space with care, you create a listing that communicates value and professionalism.
You don’t need expensive gear or special training. Just a thoughtful approach, basic tools, and attention to detail can help your photos stand out. The goal is to present your property clearly and attractively, so renters can picture themselves living there from the very first glance.
Read also:
Alabama Security Deposit Law Explained For Tenants And Owners
Rental Property Marketing Tips to Attract Tenants in a Tough Portland, Market
Frequently Asked Questions About Taking Professional Rental Photos
What is the ideal number of photos to include in a rental listing?
Around 15 to 25 high-quality photos is typically enough. This gives renters a full view of the space without overwhelming them.
Should I include exterior photos in a rental listing?
Yes. Photos of the front of the building, entryway, backyard, or any shared outdoor spaces give renters a complete view of what they’re renting.
Can rental photos include people or pets?
No. Personal items, pets, or people in photos can distract and make it harder for renters to picture themselves in the space.
Is it helpful to include floor plans along with photos?
Definitely. Floor plans help renters understand how the space is laid out, which photos alone may not fully show.
Should I use photo captions in rental listings?
Yes, brief captions like “Primary bedroom” or “Updated kitchen” can guide the viewer and help them connect the images to specific features.
Can I use filters to enhance rental photos?
Avoid heavy filters. It's better to adjust brightness or straighten lines, but filters can mislead renters and affect their trust.
Do furnished or unfurnished rentals photograph better?
Furnished spaces tend to photograph better, as they help show scale and potential layout. But clean, empty spaces can still look appealing when staged well.
Should I include photos of utility spaces like basements or laundry rooms?
If they are clean and functional, yes. Renters often appreciate knowing what storage or laundry options are available.
Can I take photos on a cloudy day?
Yes. Cloudy days provide soft, even lighting that avoids harsh shadows, especially in rooms with large windows.
How often should I update rental photos?
Update them any time the property changes. Fresh photos help keep the listing current and reflect the space accurately.